Monday, December 5, 2011

Witness Lab

This lab was used to see how good of witnesses we would make, by testing our memory. We had to cut faces from a magazine in our groups. Then we cut apart each facial feature (eyes, nose, lips, etc) and recreated new faces. We then showed the new faces to our neighbor and they had to try to remember it. We would then mix up all of the features, and the person who tried to remember the faces had to recreate the image from memory. Because there were not many facial features to choose one, it was fairly easy to recreate the faces. Everyone in our group got the faces right, the first time. I suppose that means we would be good witnesses.

This is what my face I made looked like:

Footprint Lab

In this lab we took a tub of dirt and stepped in it, leaving footprints. We then analyzed each footprint, and took information down such as the weather, the moisture in the soil, the time, the wind, and the appearance of the footprint.
  
We first prepared the soil to be stepped in.


This is one of my group members feet. We measured the length, the depth, the depth and examined the texture at the bottom. We noticed in our group the boy was the only one with noticeable treads. We also noticed that in our footprints the toe part faded up and wasnt as deep, making the shoe seem shorter then it was.
Each of our feet were different, but we felt that using footprints as main identifiers would be hard to do because of how easily they get messed up, and how many of our shoes didnt have any distinguishing features.

Create a Profile Lab

We thought the hair sample was from an African American women, and the second one was cat hair. We also matched  the smear to a lipstick, furthering the evidence that it was a women. The fingerprints could not help us, because we didnt have anything to match them to, as with the handwriting. Although we did end up identifying the handwriting as Mr. Kellys, because of the loopy letters, and the way the i's were dotted to the side.


In class, each group was given five different clues to be analyzed to recreate a crime scene, using a microscope and magnifying glass. This is a small scale of the crime scene we did later in class.
We first analyzed the clues, which were fingerprints, a hair sample, a second hair sample, a note that read "you will never find her" and a possible bloodstain/lip print.

Sunday, December 4, 2011

Poison Lab

What is poison?
Poisons are substances that cause a disturbance to organisms, most frequently through chemical reactions. Poisons are typically harmful, and cause damage or death to an organism.
Poisoning can result from many things, bites, plants, allergens, overdose of medicine, iodine, lead, food poisoning, etc.
Symptoms of poisoning include: dilated pupils, drooling, bleeding from orifices, change in skin color, increase in breathing and heart rate, nausea, diarrhea, fatigue, and headaches.

In our lab in school, we tested multiple unknown samples to see if they contained poison. We had different reagents and instructions, telling us what happens if they are a poison and how they would react.

Station One: Metals
1. Lead - Because it turned blood red when mixed with KSCN
2. Iron - Because it turned neon yellow when mixed with Potassium Iodide
3. Negative


Station Two: Sugars
All three were negative, none turned purple.


Station Three: Ammonia (pH greater then 7, strong odor and PHTH is purple/pink)
1. Postive odor, positive pH of 11, PHTH is purple/pink
2. Negative odor, positive pH of 8.5, PHTH is not purple/pink
3. Negative odor, positive pH of 8.5, PHTH is not purple/pink


Station Four: Aspirin (pH less than 7, BTB is yellow)
1. Positive pH of 5, BTB is not yellow
2. Positive pH of 6, BTB is not yellow
3. Positive pH of 2, BTB is yellow


Station Five: Cyanide (red with FE+3)
1. Does not turn red
2. Does not turn red
3. Did turn red


Station Six: Iodine (Blue with Starch)
1. Does not turn blue
2. Does not turn blue
3. Did turn blue


**Pictures from Erika Brigantti

Drug Lab

Dissolving Drugs
Testing Drugs
In this lab, we tested for three different drugs: cocaine, methamphetamine and LSD. We tested unknown solutions to see if they were any of these drugs. We tested six possibilities where the cocaine reagent turned it blue, and LSD turned it yellow. Mr. Kelly couldnt obtain false meth, so we only tested two things. The second and fourth testers were cocaine, and the sixth was LSD. We assumed that the rest were meth through process of elimination. Before the tests could be completed, we had to dissolve the drugs in water. This is a image of this process. We also used pH to find what drugs were what.

This shows the reaction in the fourth lab. (Photo from Reina Terada). Here the cocaine reagent turned blue, proving it was cocaine. The LSD reagent turned red, instead of yellow so it was negative. We also knew it was negative because of the pH of 8.

Thursday, December 1, 2011

Crime Scene Investigation
Scene 2 (Nightclub)


Materials:
1.      Clues (Exhibit 1-11)
2.      Magnifying Glass
3.      Carbon Powder
4.      Microscope
5.      Poison Testers
6.      Drug Testers


Procedure:
1.       Analyze the exhibits, and test them as necessary
2.       Match the suspects with each exhibit
3.       Put together the clues to create a story detailing what happened at the crime scene using all of the exhibits.


This are ten different suspects that they could possibly be, and we eliminated all of them except for Ginger Snap and Candi Stores through blood types. We used each exhibit to find the correct suspects and the meaning behind the clues.


Exh. 1:             Picture of a Redhead Women with slit in throat, blood on throat, laying on a car
Exh. 2:             Blood Sample is O-, possible suspects Ginger Snap or Candi Stores
Exh. 3A:          Fingerprint with Tented Arch Pattern, Matches with Candi Stores
Exh. 4/5:          Mixed Drink with possible poison, pH of 8
                        No poison found, no drugs found
                        Dark Red Lipstick (Matches with Candi Stores)
Exh. 6:             Piece of Cotton found on Ginger Snap and identified to be from Bunny Outfit owned by Candi Stores
Exh. 7:             Note in Ginger Snaps Handwriting “Please Help Me”

Exh. 7A:          Note in Candi Stores Handwriting "I Needed the Money"
Exh. 8:             Piece of Black Wool, Matches Ginger Snaps Shirt, found on Candi Stores Shirt
Exh. 9:             Gold Necklace found in Ginger Snaps dead hand, identified to be from Candi Stores
Exh. 10:           Fingerprint with Central Pocket Loop Pattern, Matches with Ginger Snap
Exh. 11:           Ulnar Loop Fingerprint, not identified with anyone from crime scene (Misc)


Story:
Candi Stores killed Ginger Snap for money, as evidenced by her note saying “I needed Money”. This note was written after she killed Ginger Snap, in her haste to escape to her friend. An eyewitness revealed the note also depicted where she escaped to, and told her friend where to find her, although the rest of the note could not be found. The murder happened after Candi Stores finished a show, dressed in a bunny costume. She then waited around the bar for her once friend Ginger Snap to get off of work, so she could try to convince her to give her the key to her safe. As she waited she drank her signature blue drink, and left her lipstick on the glass, showing that it was her that was the last one in the bar, besides Ginger Snap. When Ginger Snap went to close the bar she quickly wrote a note, hoping that someone would see it the next day at work, asking for help, as Candi made her motives known. Ginger didn’t realize that it would be her last day. As Ginger tried to sneak out the door, Candi confronted her. Ginger refused to hand over any money, and tried to run to her car. There they began to fight, Candi ripped some of her shirt, and Ginger ripped of Candi’s precious gold necklace (it was her Grandmas). This caused Candi to become infuriated, and she quickly pulled a knife from her bag and cut Gingers throat. Then she quickly wrote the note to her friend, and fled the scene. She has yet to be found. 


Monday, November 28, 2011

Handwriting Analysis


History
Handwriting analysis was first used as a way to show personality. This was over 2000 years ago, when Aristotle noticed a correlation between handwriting and personality, meanwhile the Chinese also observed this correlation.This study was not more thoroughly developed until 1622 when an Italian physician and professor of philosophy published a book on this.Graphology continued to be studied as interest expanded throughout the world in WWII. This furthered into using graphology for psychological analysis, and then the application otypological theories. 


Writing example of letter spacing
Spacing
Twelve Characteristics of Handwriting
Writing example of line quality
Line Quality

  1. Line Quality - Are the lines flowy or shaky, and are the strokes are intense and short or light and free flowing?
  2. Spacing of Words and Letters - Is the spacing consistent, are the letters and words close or far apart?
  3. Ratio of the Relative Height, Width, and Size - Is the ratio of the sizes consistent, or different sizes?
  4. Pen Lifts and Separations - Are there stops (lift of pen) between letters and words, or do they connect?
  5. Connecting Strokes - Are there connecting lines between capital and lowercase letters, and are there connections between the letters?
  6. Beginning and Ending Strokes - Are they straight or curled, long/short, and do they go up or down?
  7. Unusual Letter Formation - Are there unusual letters (all capital e's, type of a's)
  8. Shading or Pen Pressure - How is the pressure when writing (dark/light lines), pressure on upstroke or downstroke?
  9. Slant - Left or right, up and down, and consistency?
  10. Baseline Habits - Is the writing above, below, or centered on the line? Is it slanted across the line?
  11. Flourishes and Embellishments - Are there any? (Hearts on i's, curls on letters)
  12. Writing example of letter formation
    Beginning and Ending Strokes
  13. Diacritic Placement - The way t's are crossed, where letters are dotted (left, right, not at all)?
Writing example of slanted handwriting
Slant


Indications of Forgery


Pen Lifts and Hesitation -  This is gaps and overlapping of the strokes, and random pen stops in the middle of writing.
Blunt Starts and Stops - When writing abruptly stops at the end of a word and doesnt flow out.
Tremor - This occurs when the pen moves so slowly that a smooth line isnt formed.
Speed and Pressure - This occurs again when the pen is moved slowly, but it has to do with the the fact that the thickness of the line stays the same because the pressure on it is constant and doesnt change.
Patching - When there are obvious fixed errors in the forging, and the signature is obviously different. 


Types of Forgery

Normal Hand Forgery - This is when there is no model, and no copying, and the writer just writes an individual's name.
Free Hand Forgery - This is when there is a model for the writing, the writer looks off someones true signature and copies it. These tend to have a slow drawn look, and the ratios of the letters will not be the same. Even when the forgery is detected, the person who committed the crime is almost never found.
Transmitted Light Tracing - This is when the real signature is put under the paper it is being traced onto, and held up to a light source and traced.
Carbon Intermediate Tracing -  This is when the object the signature is traced onto is too thick to use light to trace the writing. Carbon paper is placed on the object where it is to be traced, and then the signature is traced over this, leaving a carbon imprint. This can then be retraced.
Transferred Forgery
Pressure Indented Image Tracing- This is when pen is used to trace something with heavy pressure over a paper, leaving an imprint. This is then traced, similar to the carbon tracing. 
Transferred Forgery - This only works if the original signature is in pen. The forger will use ethylene glycol medium over the signature and use wax paper to lift the ink. The ink can then be put onto a different paper.


Handwriting Lab
In this lab we forged each others handwriting. Georgia forged mine, and I did hers. It was harder then you would think to copy someones handwriting because of the different pressure they use, and the direction of their lines.Georgia did an alright job, and I think I did alright too!


Famous Forgery Case


Clifford IrvingThe Howard Hughes Hoax
In 1970 two authors, Clifford Irving and Richard Suskind created a plan to forge an autobiography of a billionaire Hoaward Hughes. This billionaire was reclusive, and they figured he would never come out of hiding to denounce the book. Irving told the publishing company McGraw-Hill that Hughes had asked him to write the book for him and that he agreed to continuously talk to Irving. For proof of this correspondence, Irving forged letters that he claimed to be from the billionaire, convincing McGraw-Hill to give him $765,000 for the rights to publish the book. When the book was announced to the public, Hughes surprisingly contacted reporters telling them it was false. He refused to appear in public, but voice tests were done confirming it was him over the telephone. Irving eventually confessed to the crime, and spent 17 months in prison. He later wrote a book, called The Hoax about the scheme.

Thursday, November 17, 2011

Lip Prints as Evidence?

Im sure you have heard of fingerprinting to identify someone, but what about lip prints? Think about the movie Holes, where the Kissing Bandit leaves behind her lip print at every scene. That could be used to identify her!

We collected lipprints in class by putting on lipsitck and then pressing our lips against note cards in class. We then had to analyze the lips, and point out distinguishing features. Lip prints can be identified by various features, such as the dip in the upper lip, grooves in the lip, the size of lips, or scars on the lip, as shown in this lab that we did in class. We matched unknown lipprints by using these identifying factors. When we had to identify the lips, it wasnt as easy as you would think because some in the group we had to look at looked very different from the day before.
These are my lips:

If the print is too blurred, and there are no distinguishable features, skin or saliva can be used to collect DNA to identify someone.

Hair and Fibers


History Hair and fiber analysis is relatively new in forensics, but it has become extremely important. One of the first papers on hair analysis was published in France in 1857, followed by looking at hair in microscopes in the early 1900s.  The earliest use of hair analysis in forensics was when a forensic scientist used the fact that a murder victim had died his hair before the crime occurred. This small piece of evidence was used to track down the suspect, and eventually charge him for murder. Hairs can be used to identify a persons race, gender, and even age. Hair is made up of many things, the most common being protein substances and keratin. Because of hairs ability to absorb it is good to analyze hair in poison cases. Scientists can also tell if hair had fallen out, or been pulled out or if it was forcibly removed. Scientists can find what part of the body hair is from, who and what it is from and match it to suspects and victims.
Notable Cases
Two well known cases using hair and fiber analysis are the Leo Frank Trial of 1913 and the Trial of Sacco and Vanzetti.
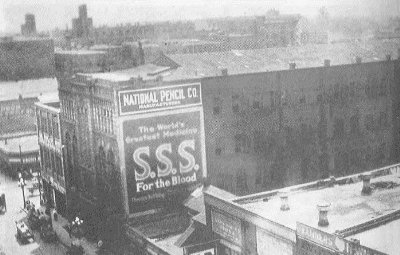
The Leo Frank Trial involved the discovery of a thirteen year old girl in the basement of an Atlanta pencil factory. The girl had gone to the factory to collect her pay check when she was murdered. The anti-Semitism feelings of the south led to the wrong conviction of a jewish superintendent, Leo Frank.This case ended up attracted attention from the US Supreme Court and the Governor of Georgia, but neither could help protect Leo Frank from being hanged. Although originally overlooked, hair analysis was eventually used as proof by matching hairs of the victim to the crime scene.

The Trial of Sacco and Vanzetti involved two Italian anarchists, who were suspected of murder. Hundreds of thousands of people believed that this was a false conviction, that the two men were innocent. Evidence was found and many pieces of evidence were not properly analyzed. Another situation many people overlooked, the fact that one of the men could be innocent, and the other guilty. In this trial, hair found in a cap matched hairs of Sacco, proving him guilty.

 This picture shows what a hair is made up of. Each of these elements can be seen under a microscope, and the texture and color can help to identify where the hair came from. This is a human hair, animal hairs look different.

These different parts include:
The Shaft
This is the part of the hair that is visible and above the scalp.
The Root and Bulb
This is the living part of the hair that cannot be seen, it is inside the scalp. The bulb is what controls the growth of the hair.
The Papilla
This is an empty area in the bulb that nourishment for the hair comes from.

There are different layers in a hair:
The Cuticle
This is the outer layer of the shaft, and looks like fish scales. It provides the health of the hair (strength, flexibility, and sheen.)
The Cortex
This is below the cuticle. This also determines the hair color and is made of keratin protein.This layer also provides most of the volume of the hair.
Medulla
This is the very core of the hair, and in very thin hair it may not appear.


Other than hairs, fibers are very important.
Major Types of Fibers
 Cotton:

This is a soft fiber that grows on seeds. It is a very commonly used fiber, and each part of it can be used. Cotton is used in many different applications, from apparel, home furnishings, automobile and even medical and surgical.


Rayon:
Rayon FibersThis is a man made fiber, although it is not considered synthetic. It is called a manufactured regenerated cellulosic fiber. This name originates from the fact that this fiber is made from cellulose. This fiber is just as versatile and comfortable as natural fibers, such as cotton. This fiber can imitate silk, wool, cotton and linen and can be dyed in a wide range of colors.This makes a very absorbent cloth, but is not a good insulator.This fiber has low durability and wrinkles easily, it also has the lowest elastic recovery of any fiber.

Linen:
Linen Fiber
This is a plant fiber, made from the stalk of the flax plant. This is one of the earliest fibers made into string and cloth. This is also the strongest vegetable fiber, its two to three times stronger then cotton! Similar to rayon and cotton, this fiber is dyed easily and is comfortable to wear. It makes a very absorbant cloth, and is good for apparel, although it wrinkles easily (it can be pressed easily to solve this) and has poor elasticity.


Hemp:
Hemp Fibers
This is a bast fiber plant that is similar to flax (linen) and ramie, therefore it possesses similar properties. Hemp excels in fiber length, strength, durability, absorbency, antimildew and antimicrobial properties. This fiber can be of different qualities, the highest coming from Cannabis Sativa, and lower qualities being Sisal and Manilla Hemp. Hemp works best in fabrics when mixed with other fibers, although high quality Hemp fabric is produced and wearable, although easily wrinkled. This fabric also withstands water better then any other textile product.

Ramie:


Hair and Fiber Collection

For hair, all samples must be handled with gloves and tweezers. The samples are carefully removed form the area and placed into labelled envelopes. These envelopes are then put into a bigger bag, as to further ensure no evidence will go missing.
*Note: If the hair is attached to something such as dried blood, do not remove it but collect the whole thing.

For fiber, use the same precautions with gloves and tweezers. Remove the samples from the scene and place them into labelled envelopes. If the fiber is so small that it may get lost, tape it down onto a piece of paper and then place into envelope. Then once again put the samples into a larger bag.

Typical Hair and Fiber Analysis
Hair and fiber analysis can be very helpful on crime scenes, and even place a suspect in custody.
Typical analysis involves analyzing hair for key features that distinguish it from other races, genders and how the hair was removed. This analysis is done through a microscope. We did this in lab:

DNA tests can also be performed on hair for more accurate results. The hair can also be used to drug test an individual.

Reliability of Hair and Fiber Crime Scene Data
This varies, and because hair can be chemically processed and changed. This makes it hard to always get perfect results, although you can undo things like coloring and perming hair, it only allows for a clearer image of what the race may be. These types of problems make it hard to always use hair as reliable evidence, although it has been done. Fibers also face problems, they cannot always be easily matched with something, and if they are because of mass production it is hard to prove what source the fiber is from.

In class we looked at hair in a microscope, and drew what they looked like. This was to help us in the crime scenes we would later analyze.


Monday, November 14, 2011

Fingerprinting


History

Fingerprinting is one of the most commonly known methods of investigation in forensics. Fingerprint identification has been used for over 100 years, and in all the billions of humans, no two fingerprints have ever been the same. Fingerprints were used as far back as the ancient times, as in ancient China and 14th century Persia, when thumb prints were on seals of important documents. In 1686 ridges, loops, and other patterns were noticed on fingerprint, these patterns were first analyzed under a microscope in 1823. In 1858 it was realized that no two fingerprints are the same, by Sir William Herschel, who used fingerprints on the back of contracts. Fingerprints were first used in America when Gilbert Thompson used his own fingerprints to prevent forgery on a document. By 1892 fingerprints were discussed as a reliable source of identification, and the first criminal fingerprint identification was collected. By the 1900s it was possible to put fingerprints into a computer system and quickly identify any matches.

Types of Fingerprints
There are three different types of fingerprints: direct, plastic and latent.
Direct Fingerprints (Patent Fingerprints)
 
These are visible prints that occur when a foreign substance is on a finger, and that substance gets pressed onto a smooth surface by the finger. The foreign substance collects dust particles, which adheres to the ridges on the fingerprint, making them easily identifiable.


Plastic Fingerprints
Fingerprint in clay with red background (4259-2009 / Z015_006 © Millennium Images)These are also visible prints, but they are impressed into a soft surface such as clay or chocolate. These types of fingerprints can also be found on surfaces with wet paint, or any other surface that soften when hand held. These prints are good to use because they need no extra enhancement to be properly viewed.


Latent Fingerprints
Fingerprints for Forensic Section.jpg 
 These are prints that are usually invisible to the naked eye. They result from perspiration that is derived from sweat pores in fingers. Because of this sweat, and other oils on fingers, when fingers touch a surface a film of these substances is left on the surface, with the pattern of the fingerprint. These types of fingerprints must be enhanced to properly view, but can still be a valuable source of identification.


How to Obtain Fingerprints (Techniques and Chemicals Used for Different Surfaces)
There are different methods used to obtain fingerprints depending on the surface (hard, porous, smooth and nonabsorbent).
Hard, Smooth, Nonabsorbent Surfaces
These surfaces, such as tile, glass, or painted wood, require powder to find the prints.  For dark surfaces use light powders, and for light surfaces use carbon or charcoal powder. Fluorescent powder can also be used although it is only visible under blacklight. For this method apply the powder to the area with the fingerprint and gently dust away the excess, revealing the fingerprint. This print, now visible, can be lifted using tape.


Soft and Porous Surfaces

These surfaces, such as cardboard, paper and cloth require chemicals to find any fingerprints. Iodine is a chemical used in a fuming process to photograph fingerprints. Ninhydrin is used in a 6% solution, it is dissolved in ethyl alcohol or acetone and sprayed onto the area with fingerprints. In around an hour the print will show up a dark purple color. A 3% solution of Silver Nitrate can be used as well, it is applied to the fingerprint  and then an ultaviolet light is used to show the prints (they will be reddish brown). This method should only be used as a last resort though, because it causes the other chemical methods to become ineffective.

We did a mini lab lifting fingerprints. We lifted them from both dark and light surfaces, so we used both carbon powder and white powder.


In class we fingerprinted our own hands to analyze the patterns. This is shown below.


Patterns
Fingerprinting is not as easy as putting together two prints, as there are millions of prints in the world. Each individual print can be characterized by certain patterns.
These patterns include:
Arches (5% of Fingerprints are Arches)
    
Plain Arch                       Tented Arch

Loops (30% of Fingerprints are these)

 
Radial Loop                        Ulnar Loop


Whorls (65% of fingerprints are these)
 
Plain Whorl
Central Pocket Whorl
  

Double Loop Whorl
Accidental Whorl